The final step of any successful move is handing over the keys to your old property. Whether you’re selling your home, ending a rental agreement, or transferring ownership to new occupants, a well-organized key handover ensures the transition is smooth for everyone involved. While many people focus on packing and transportation, preparing the property for its final handover is just as important. Choosing Flyttfirma Stockholm can help simplify your relocation while you focus on completing the final responsibilities before leaving your old home.
A proper key handover demonstrates responsibility and helps avoid misunderstandings after you move. It also gives the next occupants a positive first impression and allows you to close this chapter with confidence. By following a detailed checklist, you can ensure that nothing important is forgotten before you officially leave the property.
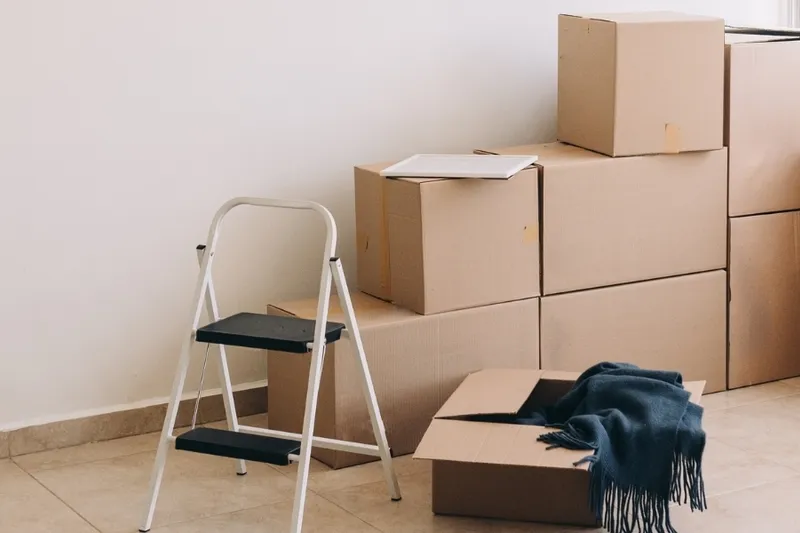
Whether you’re moving from a house, apartment, or townhouse, careful preparation makes the final handover much easier.
Confirm the Handover Date
Begin by confirming the exact date and time for handing over the property.
Coordinate with:
- The buyer
- Landlord
- Property manager
- Real estate agent
Having a confirmed schedule helps avoid confusion on moving day.
Remove All Personal Belongings
Before the handover, make sure every personal item has been removed.
Check:
- Closets
- Cabinets
- Drawers
- Garage
- Basement
- Attic
- Outdoor storage
Leaving unwanted belongings behind may create unnecessary problems.
Deep Clean the Property
A clean home leaves an excellent final impression.
Pay attention to:
- Floors
- Windows
- Bathrooms
- Kitchen appliances
- Cabinets
- Light fixtures
- Baseboards
If necessary, consider hiring professional cleaners before the handover.
Complete Minor Repairs
Inspect the property for small issues that can easily be repaired.
Examples include:
- Filling nail holes
- Tightening loose handles
- Replacing burned-out light bulbs
- Fixing dripping faucets
- Touching up paint
Simple repairs show that the property has been well maintained.
Check All Appliances
If appliances are included with the property, verify that they are working properly.
Test:
- Refrigerator
- Oven
- Dishwasher
- Washing machine
- Dryer
- Range hood
Leave user manuals if available.
Empty Trash Bins
Remove all household waste before leaving.
Dispose of:
- Food waste
- Recycling
- Cardboard
- Packing materials
A clean property is more welcoming for the new occupants.
Inspect Utility Areas
Visit utility spaces such as:
- Electrical panel
- Water meter
- Gas meter
Record final meter readings and photograph them for your records.
This helps ensure accurate final billing.
Gather Every Key
Collect every key associated with the property.
Examples include:
- Front door keys
- Back door keys
- Garage keys
- Mailbox keys
- Storage room keys
- Window keys
Missing keys may require lock replacements.
Include Access Devices
Don’t forget additional access equipment such as:
- Garage remotes
- Security cards
- Gate openers
- Alarm keypads
- Smart lock instructions
Providing everything together simplifies the transition.
Prepare Important Documents
Leave or provide documents if appropriate.
These may include:
- Appliance manuals
- Warranty information
- Maintenance records
- Security system instructions
- Utility information
Helpful documentation adds value for the new occupants.
Conduct a Final Walkthrough
Walk through the property one last time.
Inspect:
- Every room
- Closets
- Cabinets
- Outdoor areas
- Storage spaces
Confirm that nothing has been forgotten.
Turn Off Lights
Before leaving:
- Switch off lights.
- Turn off ceiling fans.
- Adjust the thermostat if required.
Following agreed property conditions helps complete the handover professionally.
Lock Windows and Doors
Ensure every:
- Window
- Exterior door
- Garage entrance
Is securely closed before leaving the property.
Meet the New Occupants
If possible, greet the new owners or tenants personally.
Provide:
- Keys
- Important information
- Emergency contact details if appropriate
A friendly introduction creates a positive experience.
Keep Handover Records
Maintain copies of:
- Signed documents
- Photos
- Meter readings
- Communication records
These documents may be useful if questions arise later.
Common Key Handover Mistakes
Avoid these common mistakes:
- Forgetting spare keys.
- Leaving personal belongings behind.
- Skipping the final walkthrough.
- Ignoring small repairs.
- Forgetting meter readings.
- Leaving trash inside the property.
Careful preparation helps prevent misunderstandings.
Frequently Asked Questions
When should I complete the final cleaning?
Ideally, cleaning should be completed after all furniture and belongings have been removed but before the key handover.
Should I provide appliance manuals?
Yes. Manuals and warranty information are helpful for the new occupants.
Why should I record utility meter readings?
Meter readings help ensure accurate final billing and prevent future disputes.
What keys should be included?
Provide every key and access device associated with the property, including garage remotes and mailbox keys.
Final Thoughts
A successful key handover is the final step in completing your move responsibly. By cleaning the property, completing small repairs, gathering all keys, organizing important documents, and performing one last walkthrough, you can leave your old home in excellent condition and avoid unnecessary complications.
Moving is about more than transporting your belongings—it’s also about leaving your previous home with care and professionalism. With thoughtful preparation and attention to detail, you can complete the handover confidently and begin the next chapter of your life knowing everything has been handled properly.